05 Feb 2025 Orchestrating Data Quality Spark Jobs Using Cloudera Data Engineering and Airflow
In our previous blog post, we saw how to run Data Quality (DQ) checks in Cloudera using Great Expectations (GX). In that setup, we implemented GX Spark jobs on a Cloudera Data Platform (CDP) base cluster with Spark submit scripts, then used Oozie to schedule the DQ jobs. Whilst this demonstrated the capabilities in a CDP base cluster, with the increasing adoption of Data Services in CDP Private and Public Cloud, we thought it would be great to run these DQ jobs using Cloudera Data Engineering (CDE).
In this specific post, we’ll dive into how to use CDE to automate and efficiently manage these DQ jobs. Additionally, we’ll enhance our DQ framework with more features, such as assigning execution priority to the rules allowing us to run multiple DQ rules based on user-defined priorities.
Cloudera Data Engineering (CDE)
If you have been following Cloudera advancements or our blogs, CDE needs no introduction. Just to recap, CDE is a Kubernetes-based service within CDP Private and Public Cloud that allows us to create, manage, and schedule Apache Spark jobs without the need to create and maintain Spark clusters. In this blog post, we’ll assume you’re familiar with CDE, its components, and how it works. If not, we suggest you check our CDE blog post.
Python Version
Before we begin implementing GX on CDE, one thing to note is that GX requires Python version 3.8 or higher. However, the latest CDE version (CDE 1.20.2-h1-b20) as of today supports Python 3.6.
To address this compatibility issue, we must build and use a custom Spark runtime Docker image. Building this Docker image would be out of scope for this blog post, but you can read up on the process here in the official Cloudera documentation.
Now, let’s start building our GX DQ job in CDE.
Uploading Artifacts
Before we create the CDE job, we need the resources. A resource in CDE is a named collection of files used by a job. Resources can include application codes, configuration files, custom Docker images, and Python virtual environment specifications.
In our case, the greatexpectation_spark_dq_dynamic.py is our custom PySpark code, providing a single point of entry for multiple GX DQ modules. It reads our custom control table in which a user can configure n number of DQ jobs, and our framework will read and execute the corresponding DQ jobs on the configured table/columns and store the results in another table. And that’s putting it simply – it does a whole lot more!
Let’s create and upload our resource with the commands below:
./cde resource create --name custom_runtime_great_expect
./cde resource upload --name custom_runtime_great_expect
--local-path /home/cdpuser/greatexpectation_spark_dq_dynamic.py

Figure 1: Custom CDE Job Creation
We can view the resource in the CDE UI by navigating to the Jobs page. Under the Configuration tab, we can see the script files within the resource.

Figure 2: CDE Job UI
CDE Job
With the resources in place, we are ready to create our CDE job using this CLI command:
./cde job create --name custom_runtime_great_expect --type spark --mount-1-resource dex-spark-runtime --mount-2-resource great-expect-resource --application-file greatexpectation_spark_dq_dynamic.py --runtime-image-resource-name dex-spark-runtime
We can test the job once by running it manually:
./cde job run --name custom_runtime_great_expect

Figure 3: Custom CDE Job Run
Viewing the Job
The CDE job we’ve created with the CLI commands can be seen in the CDE UI:
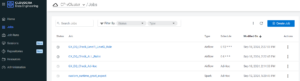
Figure 4: CDE Job UI
Below is the configuration of the custom_runtime_great_expect CDE job which we just created. We leave it as default for now:
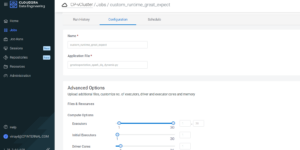
Figure 5: CDE Job Configuration
Configuring the Rules
Now that the CDE job has been created, we can configure our rules in the control table. We introduced a priority system for the rules that allows users to group multiple rules together or to establish a basic level of precedence between different sets of rules.
The example rule configuration in the control table below has 3 rule levels – 1, 2 and 3, where each rule_level denotes a set of DQ rules we want to group together. The grouping could be based on the target table, business rules, ingested data frequency, etc.
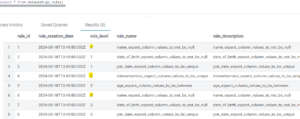
Figure 6: Rules Table
CDE Job Orchestration
Orchestration in CDE is done using Apache Airflow, a fantastic way to automate workflows and schedule them as we need.
Let’s revisit the example of rules discussed earlier and assume that, as part of a Data Quality (DQ) process in our data lake, we want to do the following:
- Run all DQ rules at a set time, for example 6 a.m., immediately after our ingestion pipelines have finished processing data.
- Run a set of DQ rules in parallel at 8 a.m.
- Run a set of DQ rules in parallel, then run another set of dependent DQ rules at 12 p.m.
- Allow users to run any DQ rules as an ad hoc job via the UI.
We can handle such scenarios with ease using the framework and rule configuration table we created, in combination with CDE’s job scheduling feature and Airflow orchestration.
Run All DQ Rules At 6 A.M.
This is as simple as scheduling our GX CDE job with a CRON schedule for 6 a.m. via the CDE UI. By default, the CDE job executes all configured rules if no rule_level is specified.
In this case, the configuration would look like this:
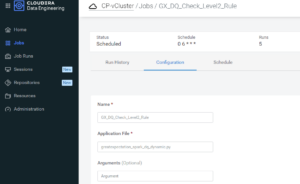
Figure 7: Running All DQ Rules at 6 A.M.
Run A Set of DQ Rules In Parallel At 8 A.M.
Let’s imagine we want to execute rules with rule_level 1 and 2 in parallel at 8 a.m., as we expect the data quality to improve following a series of data cleansing jobs executed after data ingestion. Running these jobs in parallel reduces the overall processing time whilst ensuring a faster delivery of results.
We use the Airflow UI to orchestrate this:
We pull two CDE Job Operators into the Airflow editor, then modify the Spark argument to add rule_level 1 & 2 respectively. Then we save this Airflow job and set a CRON schedule to run at 8 a.m.:
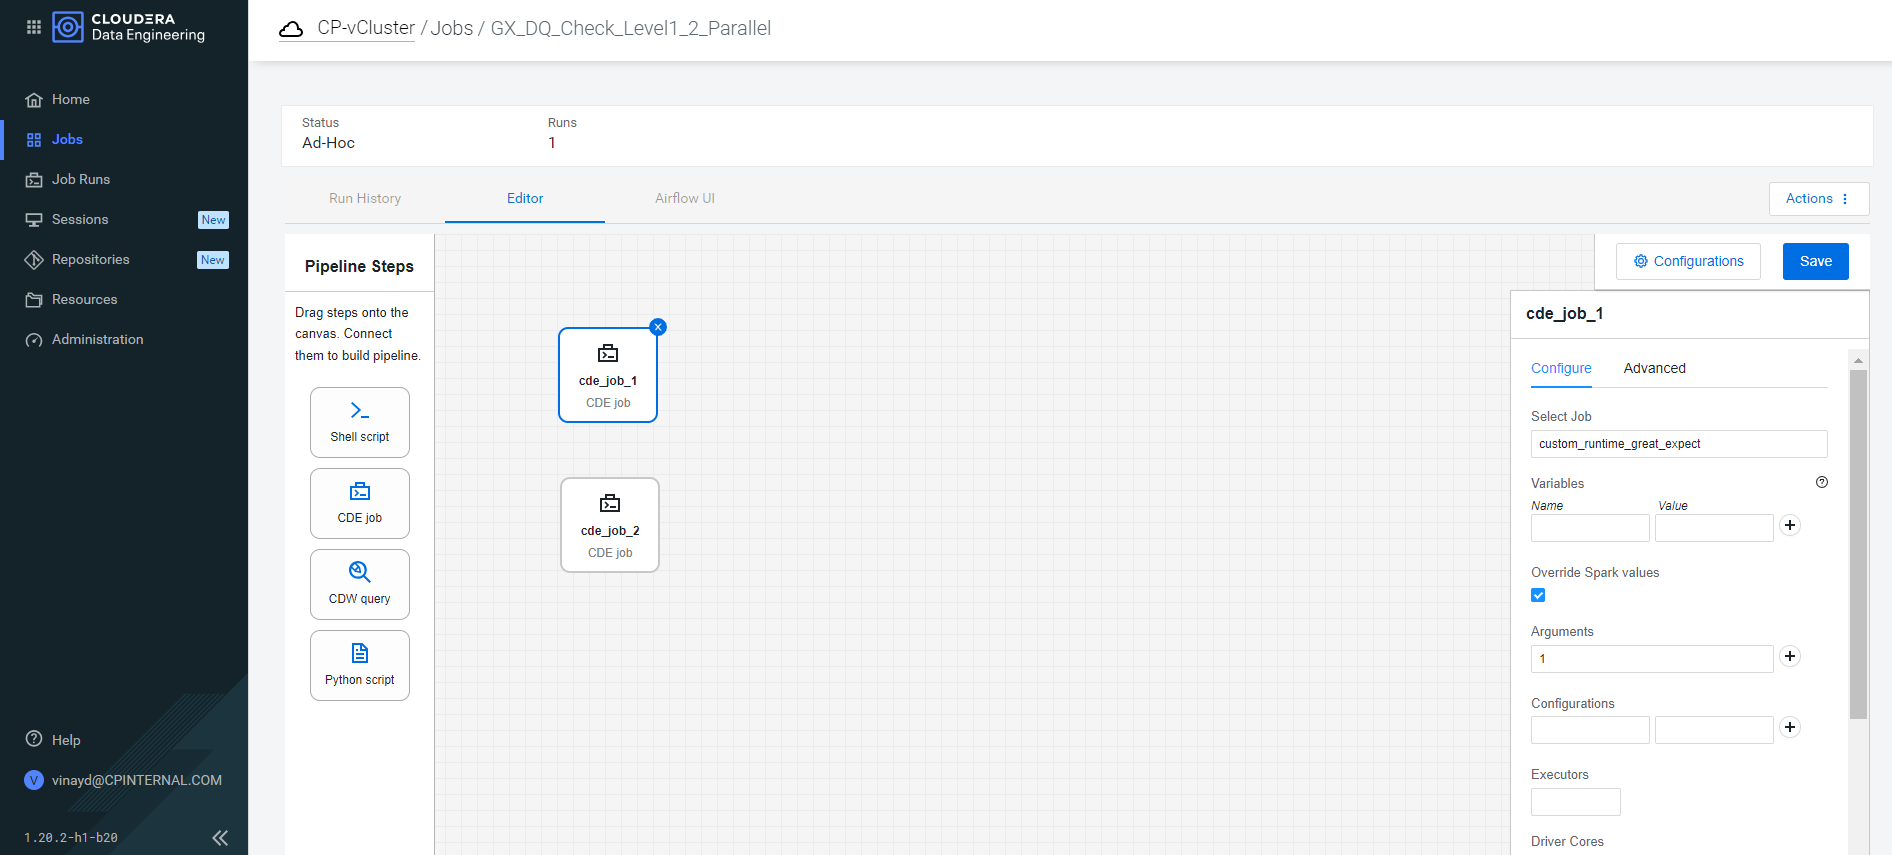
Figure 8: Parallel Job Run
Once it runs, it’s visible in the Job Runs UI, where we can verify that both CDE jobs started at the same time, improving the overall DQ job runtime:
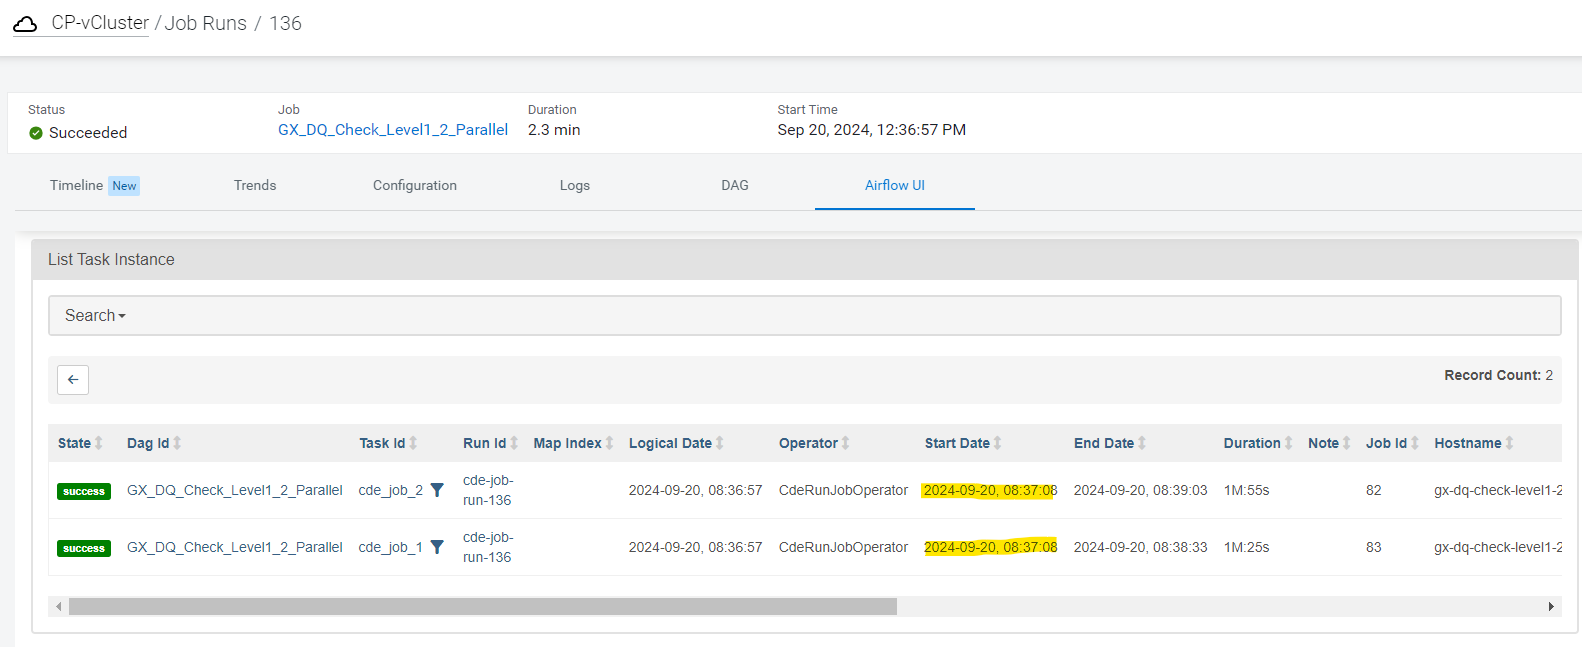
Figure 9: Job Rule Page UI
The outcome of each validation rule check is stored in the result table, which includes the following columns:
- success: Indicates whether the validation passed (true) or failed (false).
- expectation_type: The specific validation rule or expectation being checked (e.g., expect_column_values_to_be_between, expect_column_values_to_not_be_null).
- element_count: The total number of elements (or rows) checked during the validation.
- column_name: The name of the column in the validated dataset.
- unexpected_count: The number of values that did not meet the expectation.
- unexpected_percent: The percentage of values that failed the validation, with a default of 0.0 if not calculated.
Once the job has run successfully, we can view and validate the results in our result table:
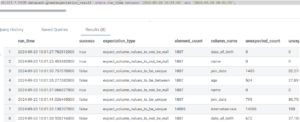
Figure 10: Parallel Job Run Result
Run A Set of DQ Rules with Dependencies At 12 P.M.
In most cases, tasks must be executed in a specific sequence, as the output or successful completion of one job is a prerequisite for the next job to proceed. By using CDE and Airflow, we can orchestrate dependent Spark jobs within a single workflow. This ensures that each job runs only after its predecessor has completed successfully, allowing for the design of complex workflows where jobs depend on the successful execution of earlier steps. This approach both ensures data consistency and facilitates seamless pipeline execution.
Let’s create an Airflow job, via the UI editor, which looks like this:
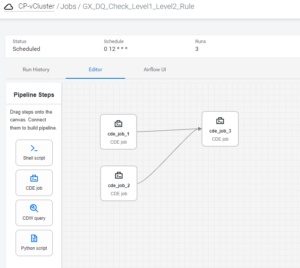
Figure 11: Dependent Job Schedule
There are 3 CDE jobs and for each of them the rule_level is passed as a Spark argument from the UI; then we schedule this job at 12 PM using a CRON expression.
We can view the scheduled job status on the Jobs page:

Figure 12: Job Status
Once this job has executed, we can view its run history, where the generated DAG ID is displayed in the Airflow UI section. The run history clearly shows that the first two CDE jobs started simultaneously, while the third job only began after the successful completion of the first two jobs. This demonstrates the dependency-based orchestration within the workflow:
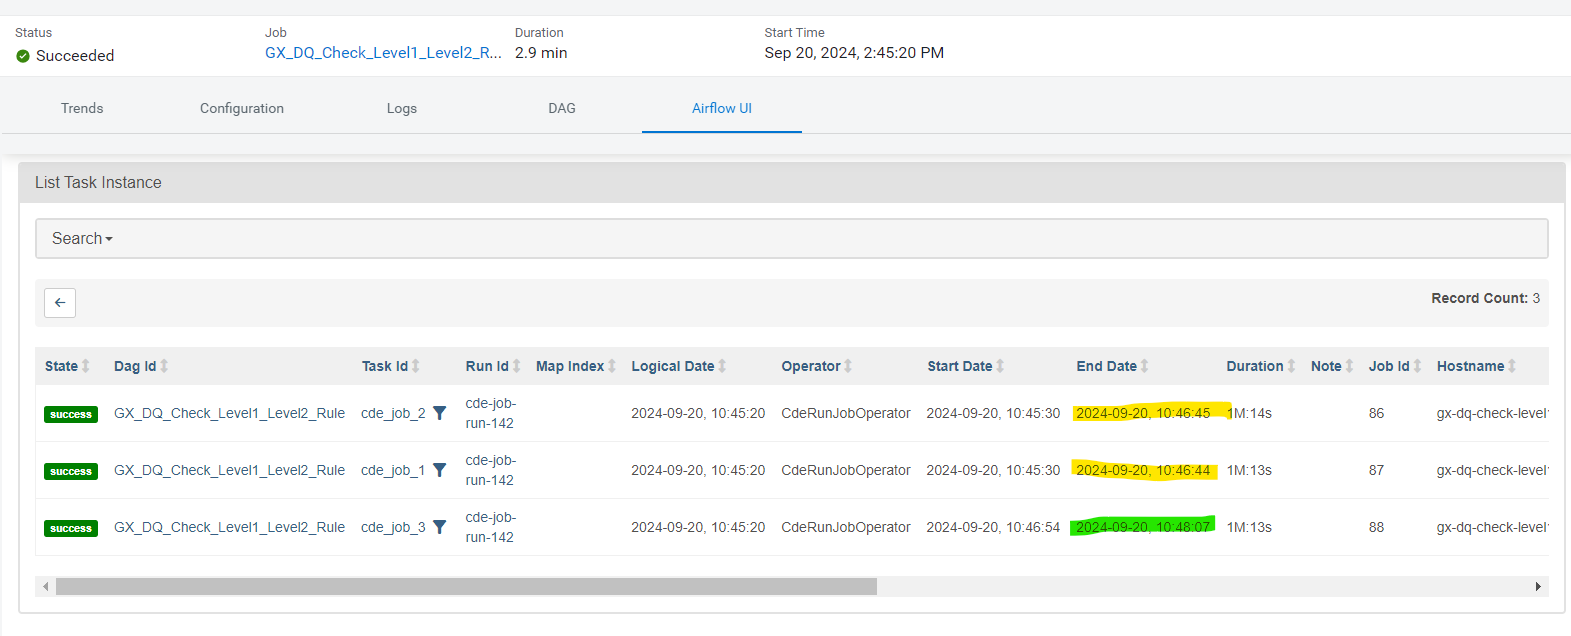
Figure 13: Airflow UI
Once the job has run successfully, we can view and validate the results in our result table:
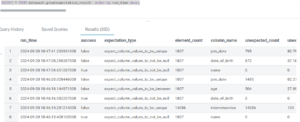
Figure 14: Dependent Job Result
Conclusion
In this blog post, we’ve explored how to automate and manage Great Expectations Spark jobs in Cloudera using CDE and Apache Airflow. Airflow is designed to integrate natively within the Cloudera ecosystem, streamlining the administration and orchestration of Spark jobs. This seamless integration enhances compatibility, security, and performance when working with Spark on Cloudera, significantly benefiting our DQ framework.
We’ve also highlighted improvements to our framework, such as introducing rule priority for rule execution during DQ checks. This enhancement ensures that validation processes are executed in the correct order, improving the reliability of the checks. What’s more, we’ve also seen how to create and configure jobs using the CDE CLI, enabling greater control and flexibility in job management. By leveraging these tools, you can optimise your data quality workflows, making them run more smoothly and efficiently.
Please don’t hesitate to get in touch with us if you want to implement a similar data quality solution, our skilled consultants will be happy to help.