13 Nov 2024 Harnessing Real-Time Data with Matillion’s Change Data Capture (CDC) Service
What is a CDC Service?
In modern data management, Change Data Capture (CDC) is essential to ensure that data across systems is always up to date. CDC services detect changes made to source systems —such as inserts, updates, and deletes—and capture them in real time, enabling a continuous flow of fresh data to target systems without having to move the entire dataset.
A best practice in BI data platforms is to mirror source data to replicas in a cloud data warehouse (CDW) or alternative storage solution. This not only allows for real-time data availability, but also prevents business users from directly accessing raw data in transactional systems, thus avoiding potential bottlenecks or system slowdowns. By creating a layer of replicas, businesses can keep their transactional systems free from the load of reporting queries, whilst maintaining up-to-the-minute data synchronisation for analytics. This combination of data mirroring and real-time synchronisation is crucial to enable the fast, data-driven decisions you need in today’s competitive environment.
In previous blog posts, we’ve shown you CDC with Snowflake and NiFi. In this blog post, we’ll explore the CDC Service from Matillion.
What is Matillion DPC (Data Productivity Cloud)?
Matillion DPC, or Data Productivity Cloud, is a cloud-native platform designed to streamline the complete data lifecycle, from ingestion to transformation and analytics. Matillion integrates smoothly with leading cloud data warehouses like Snowflake, Amazon Redshift, Databricks, and Google BigQuery.
Matillion DPC’s key offerings include:
- Data Ingestion: Seamlessly load data from diverse sources such as databases, SaaS applications, and APIs.
- CDC: Real-time data replication, ensuring that data across systems remains current without needing to reload entire datasets.
- Data Transformation: Leverage Matillion’s intuitive interface to transform, enrich, and prepare data for advanced analytics.
- Orchestration: Automate and orchestrate workflows to guarantee smooth and efficient pipeline executions.
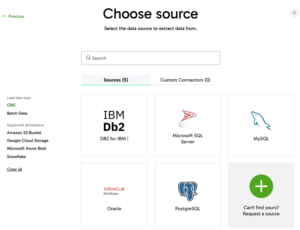
At the time of writing, the list of supported source databases is Oracle, IBM Db2, Microsoft SQL Server, PostgreSQL, and MySQL.
Now let’s dive deeper into this service!
Mastering Matillion CDC Service: What You Need to Know
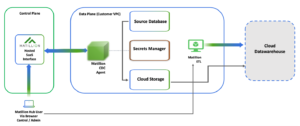
Matillion’s CDC service is designed to capture changes in data by tracking the source system change logs and replicating them in real time to the target database. For instance, imagine you’re tracking customer orders in an e-commerce database. Whenever an order is placed, updated, or cancelled, CDC captures these changes and instantly mirrors them in your cloud data warehouse. Instead of reloading the entire table, CDC tracks only the modifications, optimising data flow and performance.
Source: Matillion.com
CDC architecture is relatively straightforward: Matillion DPC SaaS is where the CDC agent is created and managed, serving as the control plane as shown above. Here, agents are configured to handle data loading and pipelines that manage agent operations, scheduling, and processing, all as part of the DPC package.
The CDC agent, a key component, is a containerised image housing the actual Matillion CDC agent software. This agent captures data changes, pushes them to the target database, and updates DPC on its status. Each agent operates as a single entity, managing one dataflow at a time, which means that a separate agent container is required for each CDC pipeline. Once active, the agent appears as «connected» on Matillion DPC, allowing it to be assigned to a specific pipeline and begin streaming data.
The source database could be on Virtual Private Cloud (VPC), or publicly accessible from any location.
Cloud storage and secret management are required to run the agent and are included among the resources generated for it. For the use case presented in this blog post, Azure Storage Account will be used for storage, and Azure Key Vault for secret management.
In real-world applications, mirrored data typically undergoes an ETL process to tailor it to specific needs, which is why this is represented as part of the Data Plane (Customer VPC) in the diagram.
The last piece in the architecture, located outside your VPC, is the cloud data warehouse; you can choose one of the CDW providers mentioned at the beginning of this article.
In the following sections, we’ll explore Matillion CDC in detail, with a focus on generating a real-time data flow between an on-premise PostgreSQL database and a Snowflake cloud data warehouse. This practical example will demonstrate how businesses can maintain continuously updated data across environments, significantly enhancing their data analytics capabilities.
Setting up Matillion CDC with Azure and Terraform
Configuring Matillion CDC involves several steps, especially when setting it up in a cloud environment like Microsoft Azure.
In this article, we will set up a CDC pipeline that connects a PostgreSQL database to a targeted Snowflake instance on Azure using Terraform, an Infrastructure as Code (IaC) tool that simplifies the agent creation process. A comprehensive, step-by-step technical guide is available in the Matillion documentation.
Step 1: Choose Your Cloud Environment
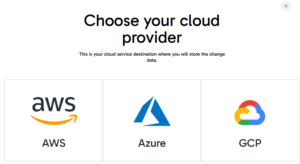
Matillion CDC supports various cloud providers like AWS, Azure, and GCP.
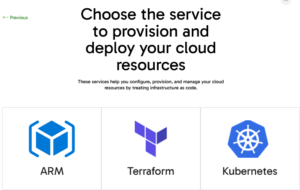
It also encompasses deployment technologies such as ARM, Terraform, and Kubernetes.
Step 2: Create a Matillion CDC Agent on Matillion Data Loader
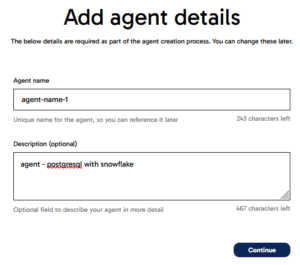
On the Matillion DPC main page, go to the Data Loader section, then to the Agents page to create an agent container using the wizard. First, type an intuitive name and an optional description so that relevant information is displayed when selecting the agent:
As mentioned before, selecting a cloud provider is the first step in this process.
You’ll also have to choose the deployment technology for agent creation.
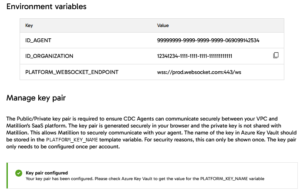
At the end of the wizard setup, three important keys will appear:
- Agent ID: This unique identifier for the agent is one of the environment variables you will define in your Terraform variables.
- Organization ID: This identifier for the organisation to which the agent belongs is also an environment variable to be set in your Terraform configuration.
- WebSocket Endpoint: This endpoint enables communication between the agent and the Matillion DPC instance, and it too must be defined as an environment variable in Terraform.
And if you haven’t already generated it, you’ll need a public-private key pair to authenticate the agent to the DPC instance. Note that the key is displayed only once. To avoid issues with authentication, especially if managing multiple agents, store this unique private key in a secure location.
Save all agent configuration details in a file on your PC, as they will be required for the Terraform template. Remember that if you create multiple agents for the same organisation within the same DPC instance, only the agent IDs will differ; all other configuration details will remain the same.
Step 3: Setup & Configure Matillion CDC Agent
To begin utilising the Matillion CDC agent in your environment, you must set up the CDC agent container. As it is designed to operate in a separate cloud environment, some configuration is required to ensure a smooth and secure integration with Azure. You’ll need the following resources:
- Resource Group: Create an Azure resource group to wrap all the resources related to the CDC Agent.
- Service Principal: Register an app with access to any tenant in the organisation (AzureADMultipleOrgs) and enable ID token requests using OAuth 2.0 implicit flow (id_token_issuance_enabled). The CDC agent will use this service principal to interact with Azure resources.
- Key Vault: Set up an Azure Key Vault to securely store the private key from the CDC agent container setup (generated in Step 2). Make sure you add the —–BEGIN PRIVATE KEY—– and the —–END PRIVATE KEY—– tags.
- Networking: Configure a virtual network (VNet) and subnet with a service delegation specifically for the container group, enabling it to manage the subnet, and a NAT gateway to facilitate secure communication with external services outside the VNet.
- Storage Account and Container: Create an Azure Storage account and container to stage data during the capture process and grant «Storage Blob Data Contributor» to the service principal.
- Container Group: Deploy a container group with a minimum configuration of 4 vCPU and 8 GB RAM to host the public CDC agent image. Set the following environment variables to ensure proper connectivity and authentication with Azure and the CDC platform:
- «AZURE_CLIENT_ID»: The service principal client ID from point #2.
- «AZURE_CLIENT_SECRET»: The service principal client secret from point #2.
- «AZURE_SECRET_KEY_VAULT_URL»: The Key Vault URI of point #3.
- «AZURE_TENANT_ID»: The Azure account tenant ID.
- «ID_ORGANIZATION»: The unique UUID that identifies your organisation to the CDC Platform (created in Step 2).
- «ID_AGENT»: The unique UUID that identifies your agent to the CDC platform, also created in Step 2.
- «PLATFORM_KEY_NAME»: The name of the Key Vault secret that stores the private key (Step 2).
- «PLATFORM_KEY_PROVIDER»: The «azure-key-vault» value.
- «SECRET_PROVIDERS»: The «azure-key-vault:1» value.
- «PLATFORM_WEBSOCKET_ENDPOINT»: The WebSocket endpoint for the CDC platform, provided in Step 2.
- Log Analytics Workspace: To monitor and debug the agent running in the container group, streamlining troubleshooting and providing insights into the agent’s performance.
Step 4: Deploying Matillion CDC Agent via Terraform
Now that the agent has been created in Matillion DPC and the required infrastructure is ready, it’s time to deploy the agent. While you can deploy the Terraform code manually via the Terraform CLI, doing so introduces the risk of human error and repetition. Instead, we recommend a CI/CD pipeline as a best practice, providing a secure and efficient method to automate the deployment process. By using a CI/CD pipeline along with a service principal, you avoid using elevated user permissions, enhancing security by eliminating the need for admin-level access to deploy resources. Furthermore, automating through CI/CD significantly reduces the chance of human error and accelerates deployment.
Start by creating an app registration with the Application.ReadWrite.OwnedBy API permission, allowing you to establish the necessary service principal. Additionally, assign the Contributor and Role Based Access Control Administrator roles at the subscription level to permit resource creation and access management; these permissions will be referenced in the Terraform azurerm provider configuration.
Please note that for this specific use case, two separate app registrations and their respective service principals are required: one to deploy Terraform, and the other to enable the CDC agent to connect with Azure. The required service principal is created with Terraform itself, as mentioned in Step 2 resource #2. However, the app registration that actually runs Terraform must be created manually, with the necessary permissions granted beforehand.
The Application.ReadWrite.OwnedBy permission is essential because it enables Terraform to create the second app registration (required by the CDC agent). After the manual setup of the primary service principal and the assignment of necessary roles, you can proceed with the automated deployment process.
The CI/CD steps are simply:
- Install Terraform.
- Run «terraform init» to initialise the providers and the backend.
- Run «terraform plan» to plan the creation/modification/deletion of resources.
- Run «terraform apply» to deploy resources only when merging to the main branch.
We used GitHub Actions to automatically deploy the Terraform code from our GitHub repository:
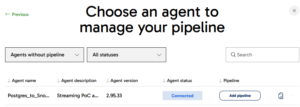
Once Terraform has created the resources and they are up and running, you will see the new agent listed on the Agent Containers screen in Matillion DPC with a Connected status.
When its status changes to «connected», the button «Add pipeline» will be enabled. In the subsequent stages the steps to create a new pipeline and assign this agent to the pipeline, will be explained.
Step 5: Prepare the Source Database
For CDC to function, most CDC services require enabling source database logs to capture real-time changes, and in our case Matillion CDC requires these logs to be enabled. Configuring this will also require a user with elevated permissions: simple read/write access isn’t enough.
What’s more, you’ll need to configure the source database server. For PostgreSQL the WAL (Write-Ahead Log) settings should be configured to meet CDC requirements. The key parameters wal_level, max_wal_senders, and max_replication_slots should be set according to the documentation. For on-demand snapshotting you’ll also have to configure a signal table for Matillion CDC. In our case, we didn’t need on-demand snapshotting, so we skipped these settings.
Step 6: Prepare Target Database
The final step in setting up the CDC agent involves preparing the target database – in our case, Snowflake. Once access to the Snowflake account with the necessary permissions has been confirmed (refer to the documentation for more detail), you will need to create a STAGE using TYPE=AVRO:
A regular stage is created with CSV which may lead to errors during setup; specifying TYPE=AVRO ensures compatibility for CDC data ingestion. For additional information on configuring Snowflake stages, please refer to their documentation.
Step 7: Create Data Loader Pipeline
Once the agent setup has been completed successfully, and source and target databases configured, you can create the pipeline to manage the data load. In the Matillion CDC console, use the standard wizard to:
- Select the corresponding source database: Choose PostgreSQL as your source database.
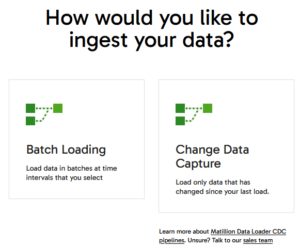
- Select the Data Ingestion mode:
Matillion offers two modes: CDC and Batch Loading. While batch loading doesn’t require a continuously running agent (as it doesn’t capture real-time changes), CDC does. For batch loading, you only need to specify the connection settings and set the frequency of data ingestion. However, for our use case, we’ll select CDC to capture ongoing changes in real time.
- Choose the Agent: This step is optional if you have already clicked on the Add pipeline button on the Agent Containers page).
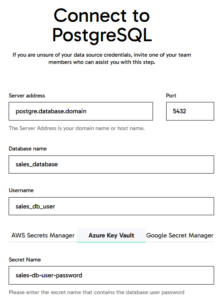
- Set the Source:
- Define the server details, user credentials, and database info to replicate.
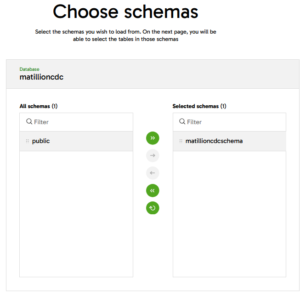
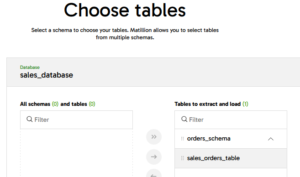
- Define the schemas and tables you want to monitor for data changes.
- Store the password securely in Azure Key Vault and define the secret name there
- Choose the Schemas to track for changes:
- Choose the Tables to track for changes:
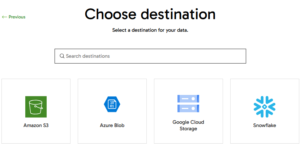
- Set up the Destination:
- Select the cloud provider; we’ll be using Snowflake for this example.
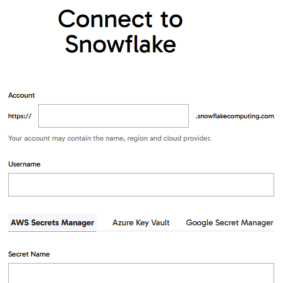
- Provide the Snowflake account details:
- Define the password in Azure Key Vault and input the corresponding secret name there.
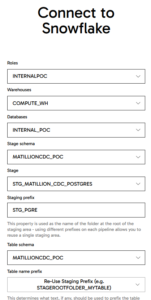
- Configure additional details, including the Role, Warehouse, Database, Stage, and Table that the agent should use; add prefixes for tables created during data capture.
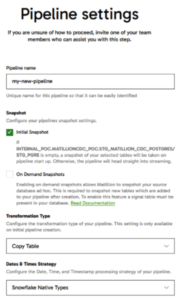
- Configure the Pipeline: Name your new pipeline and define the snapshot settings, transformation types, and select a strategy for date and time processing.
- Confirm the Summary: Before finalising, review the summary.
Once the pipeline has been created, it progresses through various phases and should stabilise with a Streaming status. You can monitor the status on the Matillion Data Loader > Pipelines page:
Real-time Data Replication
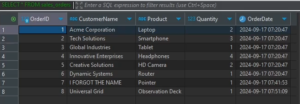
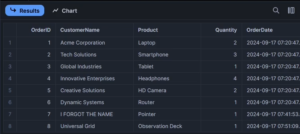
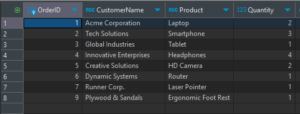
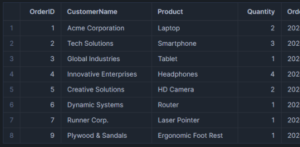
To test Matillion CDC’s real-time capabilities, we’ll run a proof-of-concept by applying three different DML statements — INSERT, UPDATE, and DELETE — and observe how accurately and quickly Matillion CDC replicates these changes. Before running any SQL statements, let’s examine the source and target tables:
PostgreSQL:
Snowflake:
Next, we’ll apply the following DML statements to the source table in PostgreSQL:
- UPDATE the customer name and product name in OrderID 7.
- DELETE OrderID 8.
- INSERT a new row with OrderID 9.
On checking the target DWH table in Snowflake, we can confirm that all changes have been captured instantaneously and accurately:
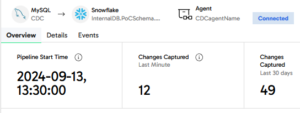
Returning to the Matillion CDC service UI, we can see these updates reflected on the dashboard:
Conclusion
Matillion Change Data Capture plays a critical role in ensuring that data is always up to date across systems, enabling businesses to leverage real-time data for faster and better-informed decision-making. In this article, we’ve explored how to configure Matillion CDC using Azure and Terraform, focusing on replicating changes from a PostgreSQL database to Snowflake. With CDC, businesses avoid direct access to transactional systems, reduce system strain, and ensure that BI platforms are always operating with the most current data.
After conducting further tests, we’ve shown that the tool is not only reliable, but fast and easy to use as well. Even when handling larger source tables with thousands or millions of changes to be captured, performance remained impressive. We observed rapid response times and seamless synchronisation, even under the pressure of high-volume data changes, reinforcing Matillion CDC’s role as a robust solution for real-time data replication needs.
As Matillion continues to consolidate its cloud SaaS offering, with CDC evolving into an even more powerful streaming service, exciting updates are on the horizon. Stay tuned for more developments! Here at ClearPeaks, our team of experts is dedicated to crafting solutions that align perfectly with your business needs. With our extensive and proven experience in the latest data technologies, we can guarantee that your data remains accurate, reliable, and primed to drive smart decision-making. If you’re looking to optimise your data management strategy, don’t hesitate to reach out – our specialist consultants are here to help!

